- Where to find them:
 NodeGraph / Right Mouse Click / Misc /
- Main Window / Extension Pack / Nodegraph / Misc /
- Shortcuts: (unassigned, use "Edit / Shortcuts" to assign)
Set Nodes to Shader allows you to quickly preview your node selection or material node with a shader, making
it act like a 'isolate select' for materials. The system works both with Mari Materials as well as individual non-material based channel workflows.
- For Material Based Workflows it works by scanning the selected node (material, multi channel merge node etc.) for the used Shader Model
and comparing it against the Shader Model currently selected in the Shader Palette. If the shader models are the same, the current node is mapped
to the shader.
- For Channel Based Workflows it works by scanning the selected Node Names for matching parts against Channel Names that have
been previously saved as Shader Inputs via the Save Shader Preset Tool in the Shaders Palette

Overview / Material Workflow |
- Create a shader in the Shader Palette. Ensure it is selected.
- In the Nodegraph select a Material Node, Multi Channel Merge Node or any other node type that on creation asks for a specific shader model
- Run Set Nodes to Shader
- If the currently selected node has the same shader model as the selected shader in the shader palette, the node will be mapped to the shader
- If you run Set Nodes to Shader without a Node selection, the tool will toggle between your last two isolated materials
- Run Reset Shader to revert the shader back to its initial state (no material soloing)
Usage Example / Material Workflow |
The below example uses a material node workflow as was introduced in Mari 4.5.
Creating a Shader |
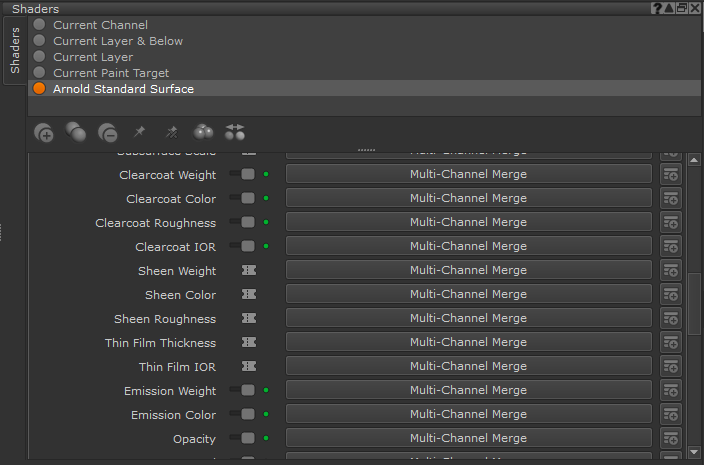
In the below example I have created a shader (Arnold Standard Surface) in the Mari Shaders Palette.
It is selected, which is important for the Material Isolating process to work.
Example of a Shader created and selected inside of the Shaders Palette

Isolating a Material in the Nodegraph using 'Set Nodes to Shader' |
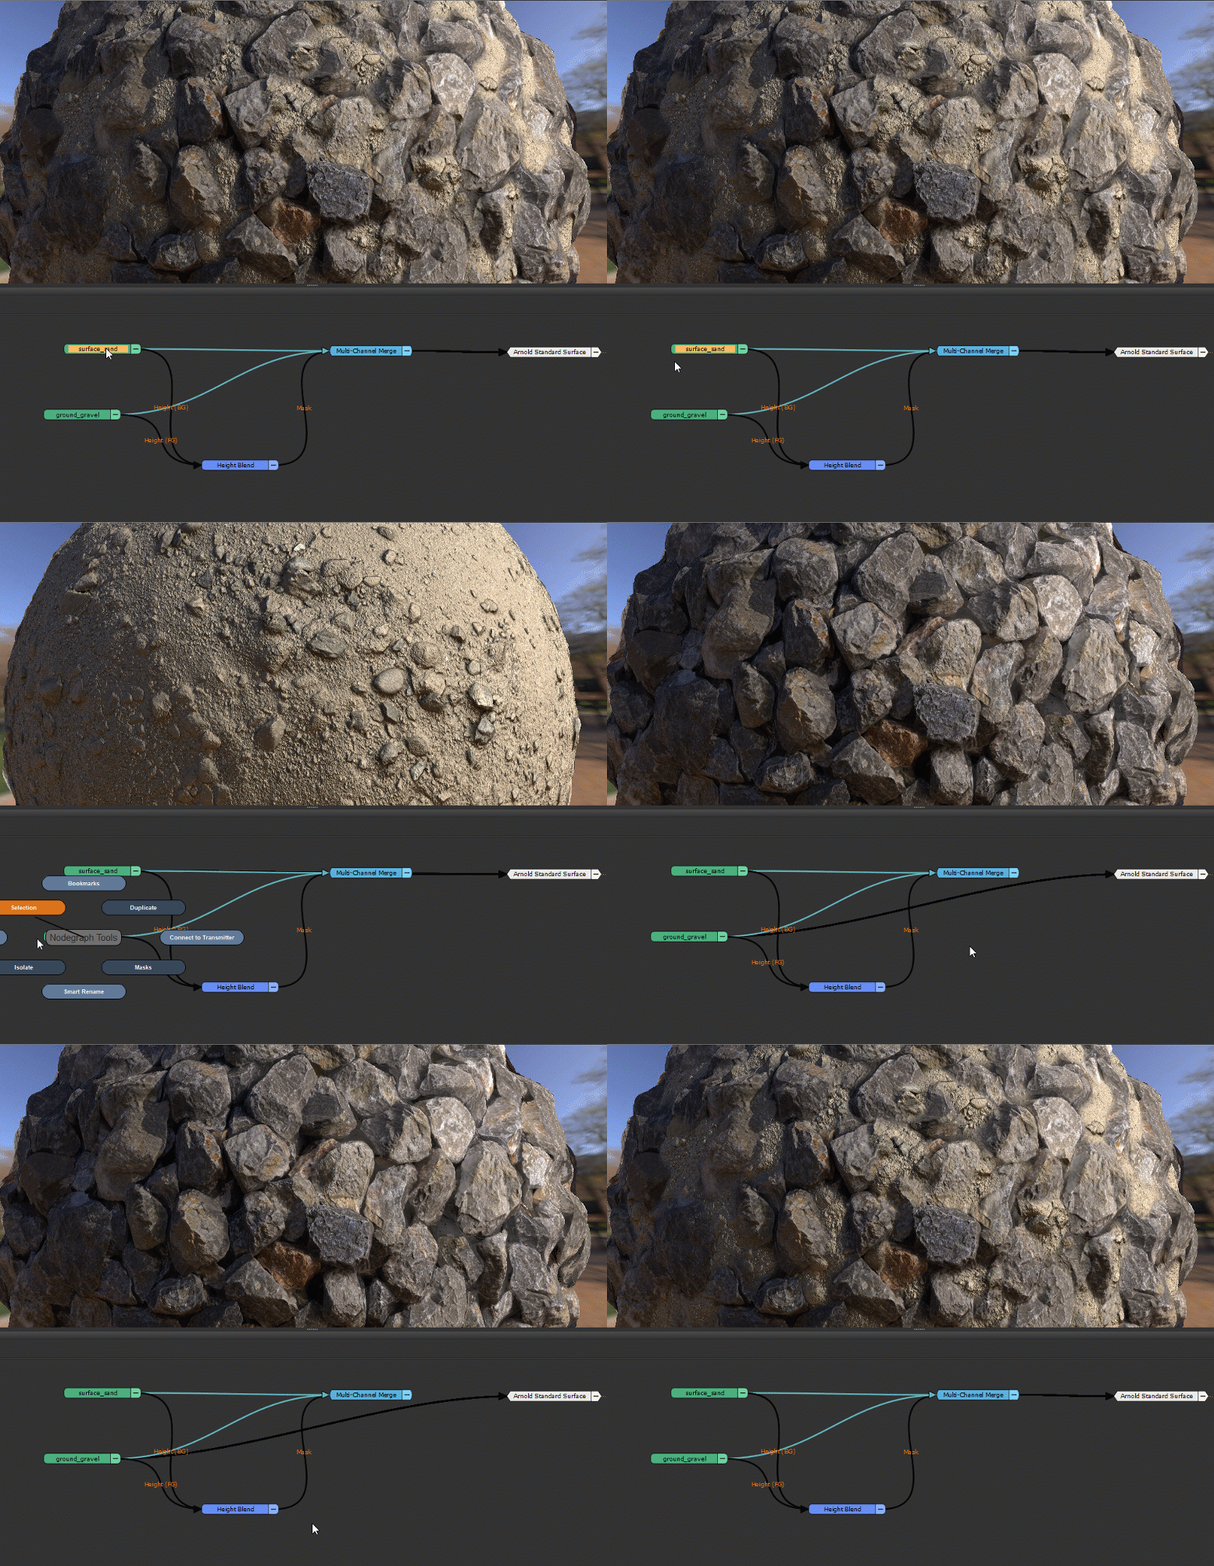
Below you can see an example of two different material nodes (green) combined via a multi-channel merge node (light blue).
The result feeds into the Arnold Standard Surface shader.
To isolate a material in the viewport select the material node you wish to isolate and execute Set Nodes to Shader.
Isolating in a Material Workflow works with any node that is part of the Material system (e.g. Material Nodes, Multi Channel Merge Nodes, Multi Channel Bake Points etc. |

If no node is selected, running Set Nodes to Shader will toggle between the last two used isolated nodes.

Reset Shader |
If you want to reset your shader connections to the initial state they were before the first time you used Set Nodes to Shader, you can use the Reset Shader option.
This is different than executing Set Nodes to Shader without a selection, which will always toggle between the current shader input mapping and the last used shader mapping, which might not necessarily be the first ever shader input configuration if you used Set Nodes to Shader multiple times in a row.


Overview / Non-Material Workflow |
- assign channels to a shader and save a shader preset
- select nodes in nodegraph containing similar names as assigned channels and run Set Nodes to Shader with Target Shader active in
Shader Palette
- Selected nodes will be mapped to the Shader. All other connections are cleared.
- Run Set Nodes to Shader without a node selection, and it will toggle between the last two 'isolated' materials
- Run Reset Shader to revert everything back to its initial state (no material soloing)
Usage Example / Non Material Workflow |
The below example uses a standard Mari Channel workflow as was available before the introduction of materials.
Saving a Preset |
In the below example we have a VrayMtl Shader.
We have assigned Channels to the different Shader Inputs via the Shader Palette using the Dropdowns.
On the right screenshot you can see the same shader setup represented in the Nodegraph
In order for the Shader to know our Name preferences for the future (Diffuse Color = DIF, Bump Map = BUP etc.)
we save a Shader Preset by right clicking / Save Shader Preset.
Whenever we create a shader with the Name VrayMtl in any project Mari will now start looking for existing Channels that
match our previously used Naming Convention.
Saving a Shader Preset on the left ..... and the shader setup with connected Channel Nodes in the Nodegraph


Isolating a Material in the Nodegraph using 'Set Nodes to Shader' |
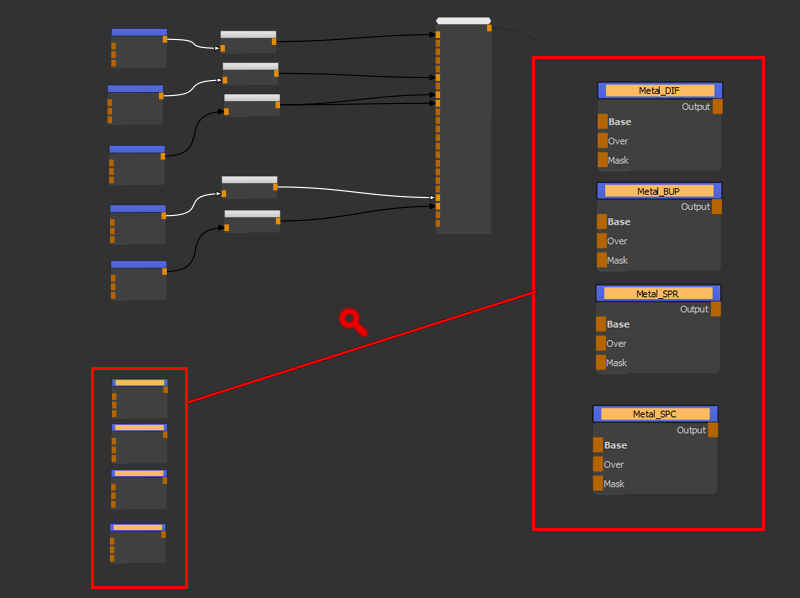
Below you can see an example of a node selection. The Nodes are currently not connected to a shader.
Notice that - while the Nodes have different Names than the Channels we have saved as part of the Shader Preset (picture above) - they contain the same
identifiers such as Metal_DIF, Metal_BUP etc.
With the Nodes selected and the Target Shader Selected in the Shader Palette, once we run Set Nodes to Shader, all Shader
connections will be made automatically. Any shader connections that can't be made (because no Node with the appropriate Name was selected)
will be cleared.
Toggling between current and previous shader mapping Run Set Nodes to Shader without a Node Selection (but with the Target Shader selected in the Shader Palette) and the previous state will be restored. This allows you to toggle between current and last state of the shader |
Reset Shader |
If you want to reset your shader connections to the initial state they were before the first time you used Set Nodes to Shader, you can use the Reset Shader option.
This is different than executing Set Nodes to Shader without a selection, which will always toggle between the current shader input mapping and the last used shader mapping, which might not necessarily be the first ever shader input configuration if you used Set Nodes to Shader multiple times in a row.


