|
Setting Button Functionality |
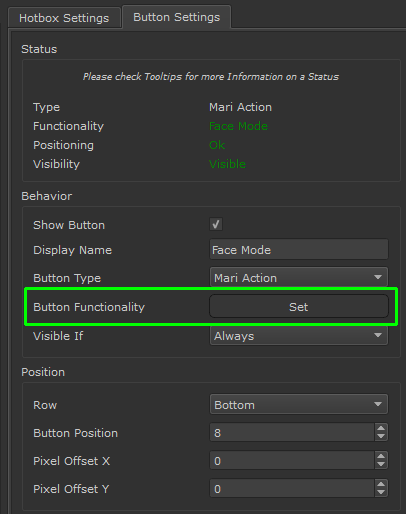
Setting the functionality of a button is done within the Behavior Section of the Button Settings.
The dialog shown after clicking on the Button Functionality Button differs depending on the selected Button Type (Mari Action, Python Script, Image Load etc.)
|
Mari Action |
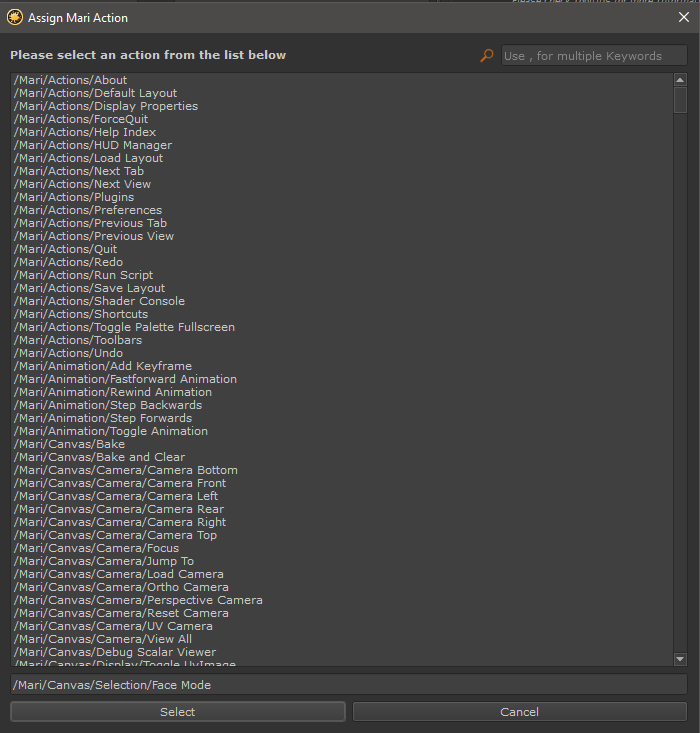
A Mari Action is any action that can be assigned a hotkey via the standard Mari Hotkey Editor.
If your Button Type specifies the type 'Mari Action' clicking the Button Functionality Button launches a dialog to set the action to execute,
You can use the Search Field in the upper right corner to search for a specific Action.
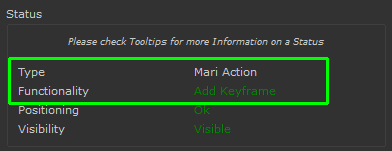
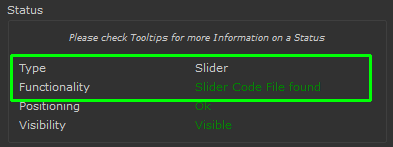
Once the dialog is confirmed the Status Group in the Button Settings will display the currently selected action assigned to the current button
|
Python Script |
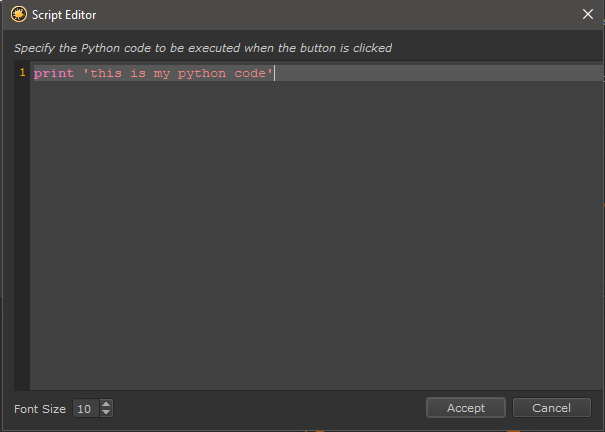
You can assign Python Code to a button to create functionality that does not exist inside of MARI's Action System.
If your Button Type specifies the type 'Python Code' clicking the Button Functionality Button launches a dialog to insert your python code
|
|
Please validate your python code via the Mari Python Console since this Script Editor does not have any code validation |
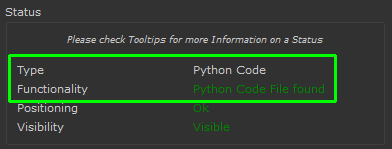
Once the dialog is confirmed and the script editor is not empty the Status Group in the Button Settings will display the successful assignment
of a Python Code File
|
|
The Python Code is saved in your Hotbox Folder in a file called 'Script_BUTTONNAME.py' |
|
Image Load |
The Image Load Functionality will load an Image into the Image Manager and set it as your Paint Through Image
If your Button Type specifies the type 'Image Load' clicking the Button Functionality Button launches a File Browser Dialog to select an Image File from Disc
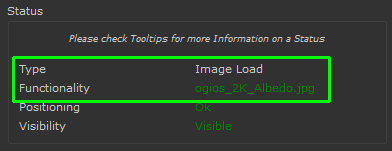
Once the an image is selected the Status Group in the Button Settings will display the Image File Name
|
Submenu |
Clicking on a button can launch a so called Submenu Hotbox.
|
|
This Setting is not available if the current Button is already part of a Submenu |
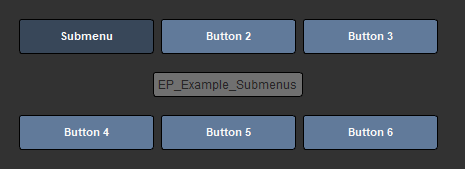
Example of a Submenu attached to a Button
Submenu Hotboxes need to be defined first via the Hotbox Manager Add Submenu Button.
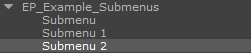
Example of a Submenus defined in the Hotbox List
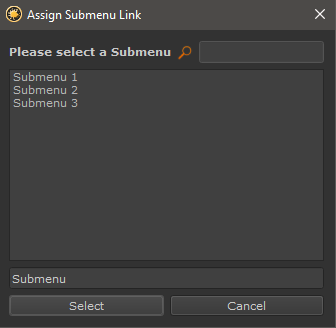
If your Button Type specifies the type 'Submenu clicking the Button Functionality Button launches a Browser to select which Submenu to link the Button to:
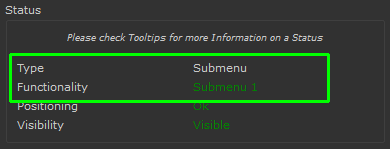
Once the a submenu is selected the Status Group in the Button Settings will display the target Hotbox Name
The Button will assume the color defined by the Submenu Color in the Hotbox Settings:
|
Slider |
Sliders allow you to create interactive elements in your Hotbox. They can be linked to Mari Functionality with a bit of simple Python code.
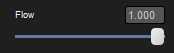
Example of a Hotbox Slider
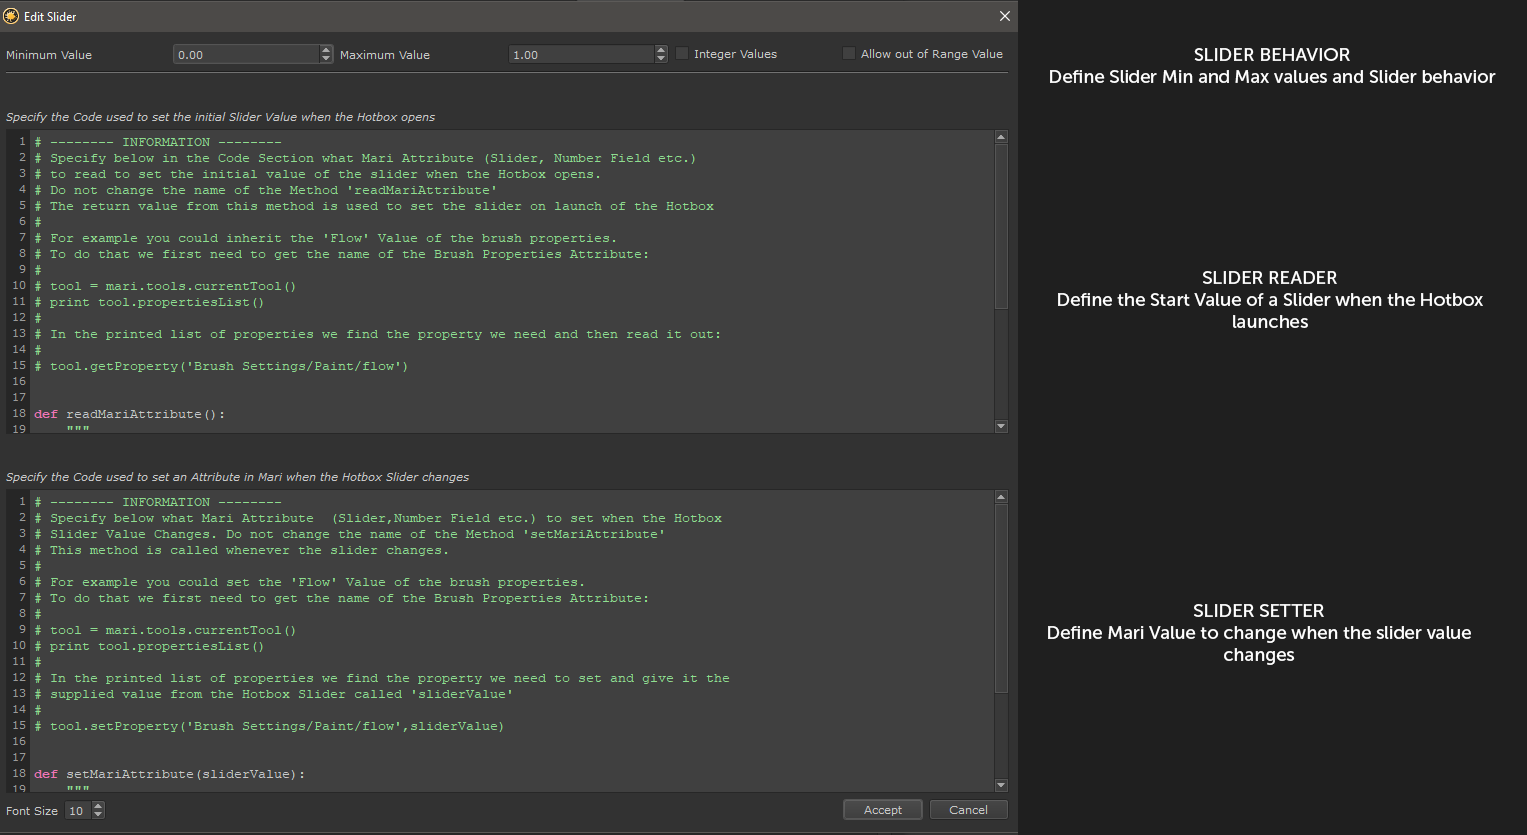
If your Button Type specifies the type 'Slider clicking the Button Functionality Button launches a dialog to insert your python code to:
- Set the Range of the Slider
- Determine the position of the slider when the Hotbox is launched
- Determine the effect of the slider when it is modified
The Interface to set the behavior of a slider. A new slider comes preconfigured with example code to change the 'Flow' Value of a Brush
|
|
Please validate your python code via the Mari Python Console since this Script Editor does not have any code validation |
Once the dialog is confirmed and the script editor is not empty the Status Group in the Button Settings will display the successful assignment
of a Slider Code File
Slider Behavior
- Minimum / Maximum
Sets the minimum and maximum value of the slider.The slider won't accept values outside these ranges unless Allow out of Range Value is turned on.
- Integer Value
If on, the slider increments in full values only and does not accept decimals
- Allow out of Range Value
If on, entering a value into the numeric field that is lower than the Slider Minimum or higher than the slider maximum is allowed.
The slider range will be expanded to accommodate the new value range.
Slider Reader
|
|
The Python Code for the slider read section is saved in your Hotbox Folder in a file called 'SliderReader_BUTTONNAME.py' |
The Slider Reader Code Section reads a Mari Attribute and sets the Hotbox Slider to an appropriate value when the Hotbox is launched.
When a new slider is created an example code is filled in to read the value of the Flow Slider from the Brush Properties.
The relevant code section is shown below:

- The name of the method always needs to be readMariAttribute()
- The method always needs to return a value
EXAMPLE:
The example in the code field inherits the value of the 'Flow' of the Brush properties.
To do that we first get the current tool
tool = mari.tools.currentTool()
We then print out a list of available properties
print tool.propertiesList()
.. and pick the value we want to change
'Brush Settings/Paint/flow'
We assign the value to a variable and return it at the end of the method
mariAttributeValue = tool.getProperty('Brush Settings/Paint/flow')
return mariAttributeValue
Slider Setter
|
|
The Python Code for the slider setter section is saved in your Hotbox Folder in a file called 'SliderSetter_BUTTONNAME.py' |
The Slider Setter Code Section reads the Hotbox Slider and sets a Mari attribute with the value from the hotbox slider whenever it changes.
When a new slider is created an example code is filled in to set the value of the Flow Slider in the Brush Properties based on the Hotbox Slider.
The relevant code section is shown below:

- The name and parameter of the method always needs to be setMariAttribute(sliderValue)
EXAMPLE:
The example in the code field sets the value of the 'Flow' of the Brush properties.
To do that we first get the current tool
tool = mari.tools.currentTool()
We then print out a list of available properties
print tool.propertiesList()
.. and pick the value we want to change
'Brush Settings/Paint/flow'
We use the methods input parameter 'sliderValue' to set the Property
tool.setProperty('Brush Settings/Paint/flow',sliderValue)
|
Checkbox |
Checkboxes allow you to create interactive elements in your Hotbox. They can be linked to Mari Functionality with a bit of simple Python code.
Example of an unchecked & checked
Checkbox in a Hotbox
If your Button Type specifies the type 'Checkbox clicking the Button Functionality Button launches a dialog to insert your python code to:
- Determine the check/unchecked state of the checkbox when the Hotbox is launched
- Determine the effect of the checkbox when it is modified
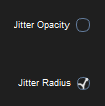
The Interface to set the behavior of a checkbox. A new checkbox comes preconfigured with example code to change the Jitter Position on/off state of a Brush

|
|
Please validate your python code via the Mari Python Console since this Script Editor does not have any code validation |
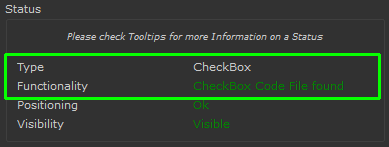
Once the dialog is confirmed and the script editor is not empty the Status Group in the Button Settings will display the successful assignment
of a Checkbox Code File
Checkbox Reader
|
|
The Python Code for the checkbox read section is saved in your Hotbox Folder in a file called 'CheckBoxReader_BUTTONNAME.py' |
The Checkbox Reader Code Section reads a Mari Attribute and sets the Hotbox Checkbox to an appropriate value (checked/not checked) when the Hotbox is launched.
When a new checkbox is created an example code is filled in to read the value Jitter Position Setting from the Brush Properties.
The relevant code section is shown below:

- The name of the method always needs to be readMariAttribute()
- The method always needs to return a boolean value (true or false)
EXAMPLE:
The example in the code field inherits the value of the 'Jitter Position' Checkbox State from the Brush properties.
To do that we first get the current tool
tool = mari.tools.currentTool()
We then print out a list of available properties
print tool.propertiesList()
.. and pick the value we want to change
'Brush Settings/Position/jitterPosition'
We assign the value to a variable and return it at the end of the method
mariAttributeValue = tool.getProperty('Brush Settings/Position/jitterPosition)
return mariAttributeValue
Checkbox Setter
|
|
The Python Code for the checkbox setter section is saved in your Hotbox Folder in a file called 'CheckBoxSetter_BUTTONNAME.py' |
The Checkbox Setter Code Section reads the Hotbox Checkbox State (true/false) and sets a Mari attribute to the appropriate value.
When a new checkbox is created an example code is filled in to set the value of the 'Jitter Position' Checkbox in the Brush Properties..
The relevant code section is shown below:

- The name and parameter of the method always needs to be setMariAttribute(checkboxValue)
EXAMPLE:
The example in the code field sets the value of the 'Flow' of the Brush properties.
To do that we first get the current tool
tool = mari.tools.currentTool()
We then print out a list of available properties
print tool.propertiesList()
.. and pick the value we want to change
'Brush Settings/Position/jitterPosition'
We use the methods input parameter 'checkboxValue' to set the Property
tool.setProperty('Brush Settings/Position/jitterPosition',checkboxValue)
PREVIOUS PAGE: Button Settings Overview
NEXT PAGE: Context Sensitive Buttons